Table of Content
Let them soak for 10 to 15 minutes, remove the foil and cotton, and use a cuticle pusher to gently remove the loosened acrylic. Forget what Pinterest and YouTube tutorials have tried to convince you because finding easy nail designs to recreate at home is not, in fact, that easy. And that's a big bummer when you get a big kick out of having elaborate nails. If you've fancied redoing your nails how could you not be tempted by acrylics, given their striking appearance, tons of creative potential, and bold statements?
But wait a second, Mary, Ive seen you on instastories getting your nails done before! Youre all well aware of how much I love Glamsquad, and having their in-home offerings every month or two is one of my favorite treats. Also, getting your nails done is always a fun, relaxing self-care moment and certainly something I like to indulge in every now and then.
How To Do A Natural Manicure At Home
Poly Gel kits are usually sold with hard dual forms, which is why this is the method we explain. You can also use Poly Gel with sticky nail forms, mostly following the process in the next section. The only difference is that you would need to dip your brush in alcohol to move the Poly Gel around since its not as fluid as self-leveling gel. The infills intervals would mainly depend upon nail growth rate that differ from person to person. The average growth rate of fingernails is around 3.47 millimeters per month and that means you will have around 2 millimeters of nail growth in around 2 weeks to 20 days.

Any oil, dust, or dirt on your nails is going to create a gap that can cause your gel nails to slide off or chip later on. Be very careful not to get any of the base coat on your skin or on your cuticles, as that can hurt the seal over your nails. If you do get some on your cuticles, wipe it off with a cotton swab. If you're wearing old polish, remove it with some nail polish remover and a cotton ball. If you're wearing acrylics or gels you don't want to keep, you'll need to remove those, too.
How Long Does Kiss Press On Nails Last
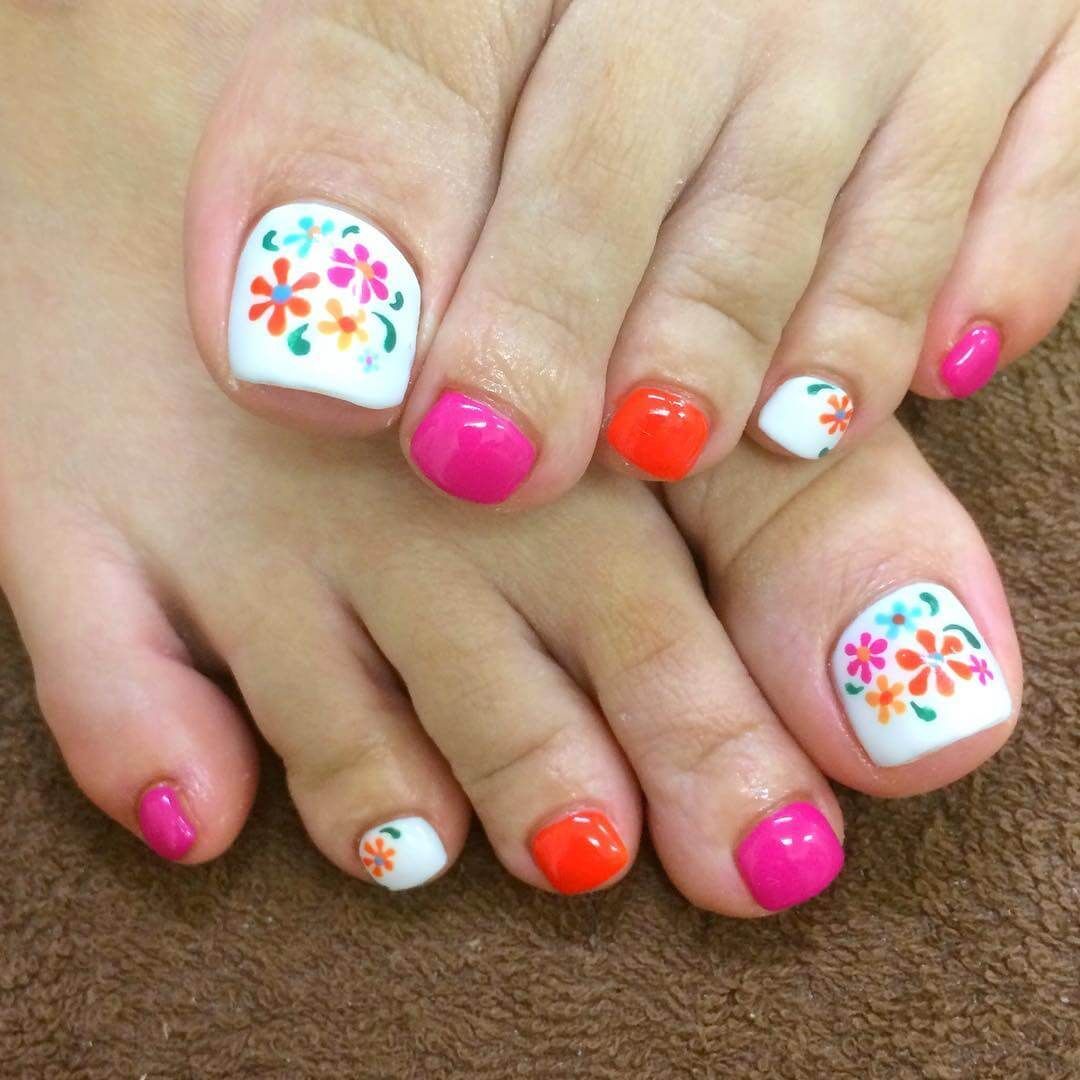
In addition to finding sites with photos of new designs, you can find forums in which people who love nail art talk about techniques and learning experiences. Dip a makeup sponge into a dark colored polish and apply the medium color to the tips of your nails, starting at the tip and moving down to create a fading effect. This creates a look of professional nail design. With the help of a nail art brush now draw a palm tree and few birds to complete the nail design. Then apply the red shimmer nail polish in the tips of the fingernails.

Taylor says to apply a product like Glass Slipper Gel Top Coat ($29) over the finished design and allow it to dry. You've probably seen polka-dot nails before, but this one creates a new layer of fun. Pick a few colors to create a bunch of tiny dots all around bare nails—variation and overlap are all part of the fun here.
Gel Nail Polish Removers to Consider
This nail design is inspired by the Navy’s uniform. The contrast of white and navy blue stripes creates a chic yet elegant look. The little glitter anchor in the ring finger breaks the monotonous stripes design. Also, the cute anchor adds more charm to the nail design. For achieving those prominent stripes, you can use nail striping tape.
This design creates a luxury appeal to the nails too. The almond-shaped nails are the perfect choice to go for this nail design. When it comes to nail design, how can I skip the heart designs? Every lady loves to add the touch of a heart sign to their fashion statement and accessories. So add them to your nails to give that romantic and lovely touch. Especially, the nail design is perfect for Valentine’s Day look.
"Do one to two coats of any nude/neutral color for the base," instructs Oung. "Once it is dry, use a striping brush and apply a vertical thin line with a nice white. Apply gloss (SpaRitual Nourish Fast Dry Vegan Top Coat, $20) to lock in the design." It’s never too late to start making Nail designs. So try making these easy and simple nail designs at home.

For mild stains, simply rub fresh cut lemon right on your finger nails and tips. Acidic lemon juice can work as a mild bleach to whiten nails. This is one to skip though if you have any cuts or cracks in the skin surrounding your nail bed though, as it will sting. Well, nothing is technically mandatory, but yes. Avoid applying a large drop of paint and spreading it around. As you paint, hold the brush at a slight angle and press gently to fan out the brush bristles.
Since you're creating nail art, try not to trim them too short. If you're not one to get crafty with intricate nail art ideas but still crave an eye-catching design, check out this gradient option. With a different blue shade on each nail, it's a dreamy contrast we can't stop staring at. If you're not sure which shades of blue will pair well together, ask your nail technician. "Once dry, use a striping brush and paint a diagonal halfway across the nail with a periwinkle color." The baby blue here reminds us of Essie's Bikini So Teeny ($8). Different shades of the same tone are always a good choice for a polished, understated take on nail art.
While very detailed nail art is best left to professionals, there are a number of designs you can create yourself. Try duo-tones, glitter and jewels, polka dots, blended colors, marbling or stamping to create a gorgeous effect. Recreate the look using striping tape to trace clean lines for your base color, then finish with dots of contrasting black or white polish. You can use a toothpick to create different-sized dots like the ones in thisChillhouse manicure.
Then instantly look glamorized for any occasions. In the blue base, the white floral swirl in the ring finger adds such a beautiful charm. You can obviously customize the design according to your will.


No comments:
Post a Comment